How to change the footer in your WordPress admin panel is a crucial skill for any website owner. WordPress footers, whether it’s copyright info, social links, or navigation, are vital for site functionality and branding. Customizing them allows you to personalize your site, enhance user experience, and improve . This guide will walk you through various methods, from simple theme customization to advanced CSS modifications, ensuring your footer is both aesthetically pleasing and optimized for your needs.
Understanding the different methods for altering your WordPress footer is essential. This includes using theme customization tools, child themes, or plugins, each with its own set of pros and cons. We’ll explore each approach in detail, providing step-by-step instructions, alongside practical examples and comparisons.
Introduction to WordPress Footers
WordPress footers are the final section of a website, typically appearing at the bottom of each page. They serve a crucial function in providing essential website information, navigation, and branding elements. They are often used to convey copyright information, links to social media profiles, and quick access to key pages.Footers are a vital component of website design, playing a significant role in user experience and overall website presentation.
A well-designed footer can enhance the user’s journey through the site, providing a clear and concise way to access crucial information and navigate important sections. The strategic placement of essential elements within the footer is paramount for efficient site use.
Types of WordPress Footers
WordPress themes offer various footer structures. Some themes employ a single, unified footer across all pages, while others allow for unique footers on individual pages or specific post types. The layout and elements within the footer are dictated by the chosen theme. Understanding the specific structure of a theme’s footer is essential for effective customization.
Importance of Footer Customization
A customized footer is crucial for branding consistency and improving user experience. A consistent and well-designed footer strengthens the brand identity, making the website more memorable and recognizable. It can also provide essential navigation, increasing user engagement and site usability. Customizing the footer can tailor the experience to specific target audiences and improve user interaction with the site.
Benefits of Changing a WordPress Footer
Modifying a WordPress footer offers several advantages. It allows for enhanced branding, improved navigation, and increased user engagement. A customized footer can reflect a website’s unique personality, improving its overall aesthetic appeal. Tailoring the footer to align with specific design goals, brand identity, and user needs is highly beneficial.
Common Footer Elements
Footers typically include copyright information, social media links, and navigation to key pages. The copyright notice clearly indicates the ownership and legal status of the website. Social media links allow users to connect with the website on various platforms. Navigation links provide users with easy access to important pages, such as the About Us, Contact, or Privacy Policy pages.
Typical WordPress Footer Structure
| Section | Content | Styling | Usage |
|---|---|---|---|
| Copyright | © 2023 My Website | Font: Arial, size 12, color: gray | Indicates website ownership and copyright |
| Social Links | Facebook, Twitter | Icons, color contrast with background | Provides links to social media platforms |
| Navigation | Home, About, Contact | Clear text, easy to read | Facilitates easy access to important pages |
| Legal | Terms of Service, Privacy Policy | Smaller font size, clear link text | Provides access to important legal information |
Methods for Modifying the Footer

Modifying your WordPress footer allows you to customize the website’s appearance and add important information like contact details or copyright notices. Different approaches offer varying degrees of control and complexity, impacting your website’s performance and maintenance. Understanding these methods is crucial for effectively managing your site’s look and feel.There are several ways to alter your WordPress footer, each with its own set of advantages and disadvantages.
Careful consideration of these factors is essential for making informed choices that align with your website’s specific needs and technical capabilities.
Theme Customization
Theme customization directly alters the footer’s code within the WordPress customizer. This approach offers a straightforward way to modify text, colors, and even add small snippets of code for more advanced adjustments. It’s particularly useful for simple changes, as it avoids potentially complex plugin installations.
- Access the WordPress customizer by navigating to “Appearance” > “Customize” in your admin panel.
- Locate the footer section within the customizer. This section’s exact location depends on the specific theme you’re using.
- Modify the footer content using the available options in the customizer. This typically involves changing text, adding or removing elements, and adjusting styles.
- Save your changes to apply them to your website.
Child Themes
Child themes are designed to modify an existing theme without directly altering the parent theme’s files. This approach is crucial for maintaining the original theme’s functionality while adding customizations. By using a child theme, updates to the parent theme will not overwrite your modifications.
- Create a new folder in your theme directory and name it “my-child-theme”.
- Inside the folder, create a file named “style.css”.
- In the “style.css” file, add the CSS rules to customize the footer.
- In the “functions.php” file, enqueue the custom CSS.
- Activate the child theme in the WordPress admin panel.
- Modify the footer’s content, styles, and functionality within the child theme.
- Save your changes.
Plugins
Plugins provide pre-built tools for modifying various aspects of your website, including the footer. They offer a wide range of options, from simple text adjustments to complex design modifications. However, overuse can lead to performance issues and conflicts.
- Search for a suitable plugin in the WordPress plugin directory.
- Install and activate the chosen plugin.
- Configure the plugin settings to modify the footer as needed. This often involves adding or editing text, links, and other elements.
- Save the plugin settings to apply changes.
Comparing Modification Methods
The table below compares the three methods based on ease of use, impact on the theme, and potential issues. This information is crucial for selecting the most suitable approach for your specific needs.
| Method | Ease of Use | Impact on Theme | Potential Issues |
|---|---|---|---|
| Theme Customization | High | Low (directly affects only the current theme) | Limited control over complex changes, potential loss of theme updates |
| Child Themes | Medium | Low (preserves parent theme) | Requires basic coding knowledge, potentially more complex for intricate changes |
| Plugins | High (for simple modifications) | Medium (often add extra functionality) | Potential for performance degradation, compatibility problems with other plugins |
Importance of Backups
Creating backups before making any changes is paramount. This precaution protects your website from data loss in case something goes wrong during the modification process. Regular backups are essential for maintaining website integrity.
Website Performance Implications
The method you choose can significantly impact website performance. Theme customization generally has the least impact, while plugins can introduce performance issues if not carefully selected or configured. Child themes are generally better than directly modifying the theme files.
Modifying Footer Content
Fine-tuning your WordPress footer is crucial for enhancing user experience and branding consistency. A well-designed footer can effectively communicate essential information, build trust, and guide visitors through your site. This section will cover modifying various footer elements, including text, images, and links, and using WordPress widgets for a more comprehensive approach.
Modifying Text, Images, and Links
Directly editing the footer’s HTML structure allows precise control over individual elements. This approach is ideal for modifying text, images, and links within the footer. However, remember that altering the default footer HTML can break your theme’s functionality if not handled carefully. Backup your website before making any changes. Use a text editor or code editor to locate the footer section in the theme’s files.
Identify the specific code elements for the desired text, images, and links. Update the relevant attributes (like `src` for images or `href` for links) to reflect the desired changes.
Ever wanted to tweak your WordPress footer? It’s surprisingly easy! Just navigate to Appearance > Customize > Footer. However, sometimes, even the most meticulously crafted WordPress sites can face issues like AI visibility aexecution problems, which can significantly impact a website’s performance. Fortunately, understanding these technical problems like ai visibility aexecution problem is key to resolving them and keeping your footer functioning smoothly.
Once you’ve addressed these potential roadblocks, you can then confidently customize your footer elements to perfectly match your brand.
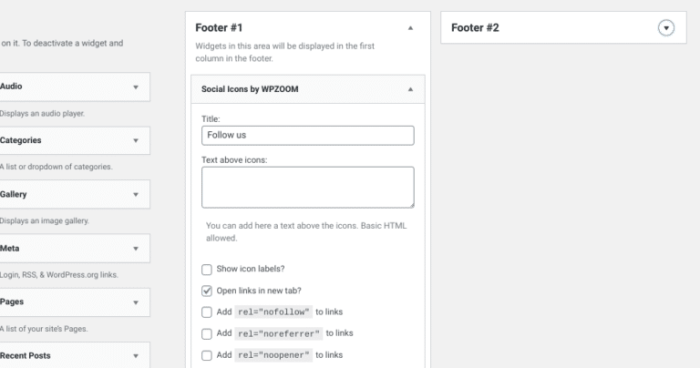
Using WordPress Widgets
WordPress widgets offer a user-friendly alternative to directly modifying HTML. They provide a visual interface for adding and arranging content elements within the footer. This approach is generally easier to manage and less prone to breaking your theme. To add widgets to your footer, access the “Appearance” section in your WordPress dashboard, then select “Widgets.” Drag and drop the desired widgets (e.g., Text, Image, or custom widgets) into the footer area.
Configure the widget settings to include the specific content, images, and links.
Examples of Adding Content
Adding copyright information, social media links, and contact details are common footer elements. For copyright information, use the “Text” widget and include the appropriate year and your website name. For social media links, the “Custom HTML” widget can be useful. Embed the appropriate icons and links within the HTML code. For contact details, utilize the “Text” widget and provide your email address, phone number, and physical address (if applicable).
Remember to maintain consistency in your branding and style across your site.
Footer Content Elements Table
| Element | Placement | Styling | Example |
|---|---|---|---|
| Copyright Information | Footer | Use a consistent font and color scheme. | © 2023 My Website. All Rights Reserved. |
| Social Media Links | Footer | Use recognizable social media icons. | |
| Contact Details | Footer | Use a clear and readable font. | Email: [email protected] Phone: 123-456-7890 |
Common Mistakes to Avoid
Avoid directly editing core theme files without backups. Do not use overly complex or non-standard HTML/CSS code in your widgets. Avoid hardcoding URLs for social media links. Ensure that all links function correctly. Verify that all content is displayed correctly across different devices.
Tips for Customizing Footer Content
Maintain consistency in your website’s branding across all elements, including the footer. Use clear and concise language to convey essential information. Prioritize accessibility by using appropriate font sizes and sufficient color contrast. Optimize your footer for mobile devices to ensure a seamless experience. Regularly review and update the footer content to reflect changes in your website or business information.
Always test your changes before publishing to ensure they work as intended.
Modifying Footer Styling
Customizing the footer’s appearance is crucial for a visually appealing and consistent website design. This involves adjusting colors, fonts, and spacing to match the overall theme and brand identity. A well-styled footer enhances the user experience and reinforces the site’s professionalism.Modifying the footer’s style in WordPress offers several avenues, from simple inline CSS adjustments to employing custom CSS within a child theme.
Understanding the different approaches and best practices ensures a clean and maintainable website.
Customizing Footer Colors
Footer colors directly impact the visual appeal and brand recognition. Changing the background, text, and link colors requires targeting the relevant elements in your theme’s CSS. A common approach involves using a child theme to avoid overwriting essential theme styles.
Customizing Footer Fonts
Selecting appropriate fonts for the footer text is vital for readability and aesthetic harmony. The choice of font should complement the overall website design and be easily readable. CSS allows for modifying the font family, size, weight, and style of footer elements. Ensure the chosen font is compatible with the rest of the website’s design elements.
Customizing Footer Spacing
Adjusting the spacing between footer elements, such as text, images, or dividers, can significantly impact the overall layout. Padding, margins, and line heights are crucial elements for controlling spacing. Consider how the spacing affects the visual hierarchy and readability of the footer content.
Using CSS for Footer Styling
CSS is the primary tool for modifying footer styling in WordPress. This approach allows for precise control over the appearance of the footer elements.
Inline CSS
Inline CSS can be used to modify the style of individual footer elements directly within the HTML code. However, this approach is less maintainable and can lead to conflicts with future theme updates. This approach is best used for quick, temporary adjustments.
Custom CSS
Using a custom CSS file within a child theme is the recommended method for modifying footer styles. This approach separates theme customizations from the core theme, preventing loss of changes during theme updates. Custom CSS files are stored in the child theme’s style.css file.
The Importance of Child Themes
Using a child theme is essential for maintaining consistent WordPress theme updates. Modifying the parent theme’s CSS directly can lead to unintended consequences and data loss during theme updates. A child theme creates a safe space for custom CSS adjustments, preserving your customizations and ensuring compatibility.
Best Practices for Applying CSS to the Footer
Using a CSS preprocessor like Sass or Less enhances code organization and readability. This helps maintain complex stylesheets, facilitating future edits and maintenance. Prioritize readability by using clear and descriptive class names. Use comments to explain the purpose of each CSS rule.
Common Footer Styling Issues and Solutions
Issue 1: Footer elements not displaying correctly.
Solution: Carefully review the CSS rules targeting the footer elements. Ensure the selectors are accurate and the styles are applied correctly. Inspect the HTML structure to confirm the elements are correctly defined.
Issue 2: Styles not applying to the footer after adding custom CSS.
Solution: Verify that the custom CSS file is correctly linked to the child theme. Check for syntax errors in the CSS code. Inspect the HTML to confirm the correct class names are being used.
Potential Conflicts Between Theme Styles and Customizations
Theme updates can overwrite custom CSS, leading to conflicts. Using a child theme minimizes this risk. When conflicts arise, review the conflicting CSS rules and adjust the custom CSS to ensure compatibility. Consider using a CSS debugging tool to isolate the issue.
Footer Styling Options
| Option | Code Example | Effect | Considerations |
|---|---|---|---|
| Change Footer Background Color | “`CSS.site-footer background-color: #333;“` | Sets the footer background to dark gray. | Adjust color code to your preference. |
| Change Footer Text Color | “`CSS.site-footer p color: #fff;“` | Sets the footer text to white. | Select a color that contrasts with the background. |
| Add Padding to Footer | “`CSS.site-footer padding: 20px;“` | Adds 20px padding around the footer content. | Adjust padding value as needed. |
| Change Footer Font Size | “`CSS.site-footer p font-size: 14px;“` | Sets the footer text size to 14 pixels. | Ensure the font size is readable. |
Troubleshooting Footer Issues

Modifying your WordPress footer can be a rewarding experience, allowing you to customize your site’s appearance. However, problems can arise, from broken links to mismatched styles. This section dives into common footer issues and provides practical solutions to get your site looking its best.Troubleshooting is an essential part of website maintenance. Identifying and resolving problems quickly ensures a seamless user experience and keeps your site running smoothly.
Ever wanted to tweak your WordPress admin footer? It’s surprisingly simple to customize. While you’re diving into WordPress admin panel tweaks, did you know that the google sunsetting assistant driving mode dashboard might offer valuable insights into Google’s evolving features? Just head to Appearance > Customize > Footer in your WordPress dashboard and you’ll find the options to make changes.

Common Footer Problems and Their Causes
Understanding the root causes of footer issues is crucial for effective troubleshooting. Common problems often stem from incorrect code implementation, conflicts with other plugins or themes, or simple errors in the modifications you’ve made.
Solving Broken Links
Broken links in your footer can be frustrating for users. They can be caused by typos in the link URLs, changes to the linked pages, or even incorrect placement of the links within the footer code.
- Verify Link Accuracy: Double-check the URLs in your footer links. Typos or outdated links are common culprits. Use your browser’s built-in link checker to identify any broken links.
- Inspect Link Structure: Carefully review the HTML structure of the links. Ensure that the link tags are properly formatted and that the attributes are correct. Make sure the tag has the correct href attribute.
- Check for Page Changes: If a link points to a page that has been moved or deleted, the link will break. Review your site’s recent changes and ensure the links in your footer still point to the correct destinations.
Addressing Styling Conflicts
Inconsistent or incorrect styling in the footer can make it look visually off-putting. These problems often arise from CSS conflicts, either from your theme’s stylesheet or from other plugins.
Tweaking your WordPress footer is a straightforward process, but finding the perfect image for it can be a challenge. To really nail that design, exploring Google’s advanced image search options is a game-changer. Google advanced image search lets you refine your results by size, color, and usage rights, ensuring you find the perfect visual for your footer without copyright headaches.
Once you’ve got the right image, you can easily implement it in your WordPress footer theme settings.
- Identify the Source: Use your browser’s developer tools to inspect the footer’s CSS. Look for any conflicting styles that might be overriding your desired appearance. Different CSS rules can sometimes contradict each other.
- Isolate the Conflict: Temporarily disable or remove potentially conflicting plugins or theme customizations to see if the problem persists. This isolates the source of the problem.
- Inspect CSS Selectors: Carefully review the CSS selectors targeting the footer elements. Ensure that the selectors are accurate and specific to avoid unintended styling changes. Use unique selectors to target footer elements.
Utilizing Browser Developer Tools
Browser developer tools are invaluable for diagnosing and fixing CSS issues. They provide a comprehensive view of the website’s code and help pinpoint the root cause of the problem.
- Inspect Element: Highlight the affected footer element in your browser. The developer tools will display the HTML and CSS rules affecting that element. Look for any conflicts or inconsistencies in the styles.
- Inspect Styles: Examine the CSS rules associated with the footer element. Check for any conflicting styles from plugins or themes. Identify which rules are causing the problem.
- Edit and Test: Use the developer tools to temporarily adjust the CSS rules to see if the issue resolves. This allows you to test your adjustments without impacting your live site.
Troubleshooting Examples
Consider a situation where a footer link is not clickable. You’d use the browser’s developer tools to inspect the link’s HTML and CSS. If the link’s `href` attribute is incorrect, you’d correct it. If the CSS is overriding the link’s styling, you’d adjust the conflicting rules.
Common Footer Issues and Solutions
| Problem | Cause | Solution | Prevention |
|---|---|---|---|
| Broken links | Typos in URLs, moved/deleted pages | Verify URLs, check for page changes | Double-check URLs before publishing |
| Incorrect styling | Conflicting CSS rules, plugin conflicts | Inspect CSS, isolate conflicts, use specific selectors | Test changes locally before deploying |
| Footer not visible | Incorrect CSS selectors, hidden by other elements | Verify CSS selectors, ensure elements aren’t overlapping | Use clear and unique selectors |
Best Practices for Footer Customization: How To Change The Footer In Your WordPress Admin Panel
Customizing your WordPress footer is more than just aesthetics; it’s a crucial element for a well-rounded website experience. A well-designed footer can enhance usability, improve , and ultimately, contribute to a positive user experience. This section dives into the essential best practices to ensure your footer aligns seamlessly with your overall website design and functionality.Effective footer design goes beyond just adding text and links.
It requires careful consideration of accessibility, search engine optimization (), and user experience (UX). By adhering to these best practices, you can create a footer that is both visually appealing and highly functional, supporting your website’s overall goals.
Accessibility Considerations
Ensuring your footer is accessible to all users, including those with disabilities, is paramount. Use sufficient color contrast between text and background elements to guarantee readability for users with visual impairments. Ensure sufficient spacing between elements to facilitate easy navigation with assistive technologies. Utilize semantic HTML5 elements like `