

How to add image icons with navigation menus in WordPress is a powerful way to enhance your site’s visual appeal and user experience. Imagine a sleek, modern menu, not just text links, but visually engaging icons that instantly communicate the page’s content. This guide will walk you through every step, from selecting the perfect icons to fine-tuning the design for optimal performance and accessibility.
We’ll cover everything from choosing the right icon libraries to ensuring responsiveness across all devices. You’ll learn how to integrate these visual cues seamlessly into your WordPress menus, creating a more user-friendly and visually appealing website.
Introduction to Image Icons in WordPress Navigation Menus: How To Add Image Icons With Navigation Menus In WordPress
Image icons significantly enhance WordPress navigation menus, transforming them from simple text links to visually engaging and intuitive interfaces. They improve user experience by making menus more visually appealing and memorable, often resulting in a more user-friendly website. This visual approach can also contribute to better brand recognition and consistency across the site.Using image icons instead of purely text-based navigation improves usability.
Icons are often more easily recognizable and understood than blocks of text, especially for users less familiar with the website’s structure. This translates to a more efficient navigation experience, helping users quickly find the information they need.
Benefits of Using Image Icons
Using image icons in navigation menus provides several benefits. Visual cues can dramatically improve user experience and site navigation. Icons create a visual hierarchy, making the site’s structure more readily apparent to visitors. This streamlined approach allows users to scan the menu and identify links effortlessly.
Types of Suitable Image Icons
A variety of image icons can be effectively integrated into WordPress navigation menus. The most suitable icons depend on the website’s theme and the type of content it presents. Icons that represent specific actions, like a shopping cart for e-commerce sites, or a calendar for scheduling pages, are highly effective. Simple, clean, and easily recognizable icons work best.
They should also be relevant to the site’s content and brand identity. For example, a blog site might use a quill or book icon for its blog section.
Adding image icons to your WordPress navigation menus is a simple task, but knowing how to tell compelling stories is crucial for B2B demand generation. For instance, understanding the “abc of storytelling for b2b demand generation” abc of storytelling for b2b demand generation can help you craft compelling narratives that resonate with your audience. Ultimately, incorporating visually engaging icons will improve the user experience and make your site more appealing, and this is a fundamental part of the WordPress menu optimization process.
Effective Image Icon Usage in WordPress Themes
Many modern WordPress themes incorporate image icons effectively within their navigation. These themes often use icons that match the overall aesthetic of the site, reinforcing a consistent visual identity. For instance, a theme with a minimalist design might use simple, geometric icons, while a more creative theme might incorporate more stylized icons. Observing how these themes use icons offers valuable insights into creating visually appealing and functional navigation menus.
Adding image icons to your WordPress navigation menus is a simple process. You can easily customize your site’s look by using images instead of just text. This is a great way to make your site more visually appealing. Speaking of visuals, check out this fascinating profile on how James McLurkins’s robots propelled him into the spotlight as a visible expert visible expert profile how james mclurkins robots made him famous.
Knowing how to effectively use visual elements in your navigation menu can really enhance user experience and improve your site’s overall design.
Examples of Effective Icon Usage
Examples of effective icon usage in different WordPress themes include a social media icon set for linking to external profiles, an email icon for the contact page, and a shopping cart icon for an online store. These are not only visually appealing but also instantly communicate the function of each link. Furthermore, these icons, if chosen correctly, reinforce the site’s brand image and consistency.
Importance of Accessibility
Accessibility is crucial when incorporating image icons into WordPress navigation menus. Ensure that the icons are used alongside descriptive text labels. This helps screen reader users understand the purpose of each link, providing a more inclusive experience. Additionally, the icons should be clear and easily distinguishable, even at reduced sizes. This helps users with visual impairments access the information they need.
Using alternative text (alt text) for the images is essential. These practices contribute to a more accessible and user-friendly website.
Integrating Icons with WordPress Navigation Menus
Adding image icons to your WordPress navigation menus can significantly enhance visual appeal and user experience. This visual cue can improve navigation clarity and make your website more memorable. Icons can quickly communicate the purpose of a menu item, helping visitors quickly find what they need.This section delves into practical methods for integrating image icons with WordPress navigation menus.
We’ll cover various approaches, from directly uploading images to modifying existing themes. The key is to understand the different methods and choose the one that best suits your needs and technical expertise.
Adding image icons to WordPress navigation menus is pretty straightforward. You can easily customize your site’s look by using visual elements. Speaking of visuals, check out this week’s search trend on Google Street View, showcasing the Disney theme parks in incredible detail this week in search explore disney theme parks google street view. It’s a fantastic resource for anyone wanting to spruce up their navigation menus with appropriate icons.
There are various plugins available to help with this process.
Methods for Uploading and Selecting Image Icons
WordPress provides a straightforward way to add icons. You can upload images from your computer or use icons from a library. Image formats like PNG and SVG are best for icons due to their transparency and scalability. Ensure the icons are appropriately sized for different screen resolutions to avoid distortion.
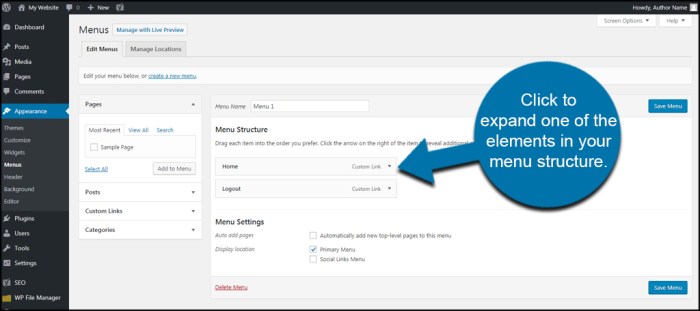
Adding Image Icons to Existing Navigation Menus
This process involves accessing the WordPress customizer or the menu editor. Navigate to your navigation menu settings. Select the specific menu item you wish to add an icon to. Locate the field to upload or select an image icon. Select the chosen icon and save the changes.
It is crucial to preview the changes before finalizing them to ensure the icon displays as intended.
Creating Custom Image Icons for Specific Needs
If your desired icon isn’t readily available, you can create your own. Various design tools, like GIMP, Adobe Photoshop, or online graphic editors, can help. Keep the file size small for optimal website performance. Ensure the icon aligns with your brand and complements the overall aesthetic of your website. Consider using vector graphics (SVG) for scalability and quality.
Modifying Existing WordPress Themes to Support Image Icons in Navigation
Some themes may not natively support image icons. If your theme doesn’t have a built-in method, you may need to modify its code. Consult the theme’s documentation for specific instructions. If the documentation is unclear, consider seeking support from a developer who understands the theme’s code structure. Careful modification is essential to avoid introducing bugs or conflicts with the theme’s other features.
The modification should ideally enhance functionality and not compromise the overall theme structure.
Optimizing Image File Sizes for Performance
Image file sizes directly impact website loading speed. Large image files can significantly slow down your site. Using tools to compress images, such as TinyPNG or ImageOptim, can drastically reduce file sizes without sacrificing visual quality. Choose the right compression settings to maintain image quality while minimizing file size. Optimized image sizes lead to a faster user experience and improved search engine rankings.
Choosing the Right Image Icon Libraries
Selecting appropriate image icons for your WordPress navigation menus is crucial for a visually appealing and user-friendly website. The right icons can enhance readability, improve aesthetics, and communicate the purpose of each menu item effectively. Choosing from a variety of libraries can be overwhelming, so understanding the options available and their implications is key to a successful design.Different icon libraries offer varying styles, functionalities, and licensing terms.
This section will guide you through the process of selecting the perfect icon library for your WordPress site, considering factors like features, licensing, and design compatibility.
Popular Free Icon Libraries, How to add image icons with navigation menus in wordpress
Various free icon libraries cater to diverse design needs. Familiarizing yourself with popular options is essential to choosing the most suitable icons for your project. These libraries often come with a wide array of styles, ensuring a match for your website’s overall aesthetic.
- Font Awesome: A highly popular and widely used library, Font Awesome offers a vast collection of vector icons. Its popularity stems from its extensive range, which includes diverse styles, sizes, and color options. These vector icons are scalable without losing quality, making them suitable for various screen sizes. Font Awesome’s popularity is due to its versatility and community support, providing extensive documentation and tutorials.
- Ionicons: This library provides a clean, modern aesthetic. Ionicons’ focus is on simplicity and clarity, making them a good fit for websites aiming for a minimalist or contemporary design. The library’s focus on a streamlined visual language allows for easy integration into different design styles.
- Material Design Icons: For projects adhering to the Material Design guidelines, this library is a natural choice. The icons’ consistent style ensures a cohesive look and feel, particularly beneficial for apps or websites following Material Design principles. The uniformity of the icons creates a sense of familiarity and usability for users accustomed to the design language.
Comparing Icon Libraries
Evaluating the features and functionalities of different icon libraries is crucial for a successful selection. Understanding the nuances between various libraries helps you make an informed decision. A table below illustrates key differences:
| Library | Features | Scalability | Licensing |
|---|---|---|---|
| Font Awesome | Extensive library, diverse styles, customizable | Excellent | MIT License |
| Ionicons | Clean, modern style, easy integration | Good | MIT License |
| Material Design Icons | Consistent with Material Design guidelines | Good | Apache 2.0 License |
Licensing and Usage Terms
Understanding the licensing terms is vital for proper usage of any icon library. The legal terms dictate how you can use the icons on your site.
- Licensing Differences: Each library adheres to different licensing terms. Font Awesome, Ionicons, and Material Design Icons all operate under permissive licenses, but the specifics vary. Understanding the nuances of each license is crucial to ensure compliance and avoid legal issues.
- Attribution Requirements: Some licenses may require attribution to the original authors or the icon library. Always consult the specific license terms to determine the necessary attribution.
Custom Icons vs. Pre-made Icons
Deciding between custom and pre-made icons involves careful consideration of project needs and resources.
- Custom Icons: Designing custom icons allows for complete control over style and aesthetic alignment with your brand. However, this approach demands design skills and resources, potentially increasing development time.
- Pre-made Icons: Pre-made icons offer a quicker and more cost-effective solution. They can be integrated seamlessly into your WordPress site, accelerating the design process. A wide variety of styles are available, enabling a faster integration process.
Icon Style Examples
Different icon styles suit various design themes.
- Flat Icons: These icons have clean lines and simple shapes, often suitable for minimalist or modern themes.
- Line Icons: These icons utilize thin lines to depict shapes, ideal for themes prioritizing a subtle or contemporary aesthetic.
- Filled Icons: These icons utilize solid colors to depict shapes, suitable for themes that emphasize visual prominence or a more traditional feel.
Responsive Design Considerations
Adding image icons to WordPress navigation menus is a great way to enhance visual appeal and user experience. However, the design must adapt seamlessly to various screen sizes and devices. Ensuring responsiveness is crucial for a positive user experience across desktops, tablets, and mobile phones. This section details strategies for making your icon-enhanced menus work flawlessly on all devices.Effective responsiveness for image icons in navigation menus involves adjusting icon sizes and positions based on screen resolution.
This dynamic adaptation maintains readability and visual appeal without sacrificing usability on different devices. Properly implemented responsive design prevents icons from appearing too large or small, or from overlapping other menu elements, ensuring a smooth user experience.
Ensuring Icon Responsiveness Across Devices
Responsive design principles are essential for adapting icon sizes and positions dynamically. This ensures that icons remain legible and visually appealing across different screen resolutions. Using CSS media queries allows you to define specific styles for various screen sizes, enabling you to adjust icon dimensions and placement as needed.
Adapting Icon Sizes and Positions Based on Device Resolution
Employing CSS media queries is a powerful technique for adjusting icon sizes and positions. By targeting different screen widths, you can define unique styles for various devices. For example, a media query targeting smaller screens might reduce icon sizes while maintaining proper spacing.
- Use the
max-widthproperty in CSS to set a maximum width for icons on smaller screens. - Employ the
min-widthproperty to set a minimum width for icons on larger screens, ensuring they don’t appear too small. - Utilize the
transform: scale()property to adjust icon sizes proportionally. - Employ CSS
@mediarules for responsive design, defining styles based on screen width and height. For instance, you might use a rule like@media (max-width: 768px) .icon width: 20px;to reduce icon size on smaller screens.
Using CSS to Control Icon Responsiveness
CSS is a key tool for achieving responsive icon design. By utilizing CSS media queries and other responsive design techniques, you can precisely control the appearance of icons across various screen sizes. Employing these methods ensures that the icons are legible and visually appealing on all devices.
- Employ CSS classes to style icons. This allows for easy modification of icon appearance without affecting other elements.
- Utilize the
widthandheightproperties in CSS to set specific dimensions for icons. - Use the
transform: scale()property for responsive resizing, maintaining aspect ratios. - Incorporate margin and padding values to ensure proper spacing between icons and other menu elements.
Responsive HTML Table Layout for Icon Behavior
A responsive HTML table can effectively illustrate how icons behave on different devices. This visualization demonstrates how icons adapt to various screen sizes, showcasing the responsive design implementation.
| Device | Screen Size (Example) | Icon Size (Example) | Icon Position |
|---|---|---|---|
| Desktop | 1920px | 32px | Aligned with text, good spacing |
| Tablet | 1024px | 24px | Slightly smaller, maintaining spacing |
| Mobile | 360px | 16px | Compact, still readable |
Avoiding Visual Issues When Scaling Icons in Different Browsers
Ensuring consistent scaling across different browsers is crucial for a positive user experience. Inconsistencies in scaling can lead to visual discrepancies, potentially impacting the user interface. Understanding browser-specific rendering behaviors and utilizing vendor prefixes for CSS properties can mitigate these issues.
Customizing Icons and Styling
Image icons in WordPress navigation menus offer a visually engaging way to enhance user experience. Beyond simply integrating them, you can significantly personalize their appearance to match your theme’s aesthetic. Customizing these icons allows for a unique and professional look, setting your site apart from the competition.Effective customization goes beyond simply changing colors. It involves thoughtful consideration of size, positioning, and hover effects to create a cohesive and dynamic visual style for your navigation.
This section dives into the practical techniques for modifying these aspects using CSS, enabling you to fine-tune your menu’s visual appeal.
Customizing Icon Appearance with CSS
Modifying icon appearance is straightforward using CSS. You can control the color, size, and positioning of individual icons, or apply styles consistently across your entire menu. By targeting the specific HTML elements associated with your icons, you can apply CSS rules to achieve the desired look.
Modifying Icon Colors
To alter icon colors, use the `color` property in your CSS. This can be applied directly to the icon element itself, or to a class assigned to the icon container. For instance, to change the color of all icons to a vibrant blue, you would use a selector targeting the relevant HTML element. Example:“`CSS.menu-icon color: #007bff; /* Change to your desired blue – /“`This CSS rule would apply the blue color to all elements with the class “menu-icon”.
For a more targeted approach, you could modify the color based on the icon’s state (normal, hover, active).
Adjusting Icon Sizes
Controlling icon sizes involves using the `font-size` property, potentially in conjunction with `line-height` for accurate scaling. Consider the context of the surrounding elements when adjusting the size to ensure the icon remains proportional and visually appealing. Example:“`CSS.menu-icon font-size: 20px; /* Adjust the size as needed – / line-height: 1; /* Ensures the icon sits correctly within the element – /“`Experiment with different values to achieve the desired icon size.
If using a library, the icon’s size might be influenced by the library’s default settings.
Positioning Icons
Positioning icons within the navigation menu involves using standard CSS positioning techniques. You can adjust the icon’s position relative to its container or other elements on the page. Example:“`CSS.menu-item a .menu-icon margin-right: 10px; /* Adds space to the right of the icon – / vertical-align: middle; /* Vertically aligns the icon – /“`Adjust the `margin`, `padding`, and `float` properties as needed to precisely position the icons within the menu structure.
Creating Custom Hover Effects
Hover effects add dynamism to your navigation menu. You can change the icon’s color, size, or add subtle animations to enhance user interaction. Example:“`CSS.menu-item a .menu-icon:hover color: #ff0000; /* Change color on hover – / transform: scale(1.2); /* Scale up the icon on hover – / transition: all 0.3s ease; /* Smooth transition – /“`This example demonstrates a hover effect that changes the icon’s color to red and slightly enlarges it on hover.
Adjust the `transform`, `transition`, and other properties to create unique and engaging hover animations.
Custom CSS Stylesheet for a WordPress Theme
A dedicated CSS stylesheet tailored to your WordPress theme allows for consistent icon styling across your entire site. Create a new stylesheet file in your theme’s CSS directory. This file will contain all the specific CSS rules for styling the icons. Remember to enqueue this stylesheet in your theme’s functions.php file.
Creating a Unique Visual Style
Combine the techniques discussed above to create a unique and cohesive visual style for your navigation menu. Consider the overall theme, color palette, and target audience to create a visually appealing and intuitive user experience. For example, you could use a gradient background color on hover or add a subtle animation to the icon when the user hovers over it.
Accessibility and Implications
Adding image icons to your WordPress navigation menus can enhance user experience, but it’s crucial to consider the accessibility needs of all users, including those with visual impairments, and the impact on search engine optimization (). Proper implementation of alternative text and thoughtful icon choices can significantly improve both user experience and search engine visibility.Visual accessibility is paramount. Screen reader users rely on alternative text descriptions to understand the purpose and function of visual elements.
Failing to provide accurate alt text can lead to a frustrating user experience and potentially exclude users with disabilities.
Alternative Text for Screen Readers
Providing descriptive alternative text for image icons is essential for screen reader compatibility. This text should accurately convey the meaning and purpose of the icon, helping screen reader users understand the navigation options. Avoid generic descriptions like “image” or “icon”. Instead, use words that clearly explain the link’s destination.For example, an icon representing the “About Us” page should have alt text like “About Us,” while an icon for a “Contact Us” page should use “Contact Us.” A shopping cart icon would use “Shopping cart,” allowing users to understand the context.
Remember that alt text is crucial for users relying on screen readers.
Impact on Search Engine Optimization
Search engines use alt text to understand the context of images. Well-written alt text helps search engines index and rank your website, enhancing your visibility to users searching for relevant information.Descriptive alt text that accurately reflects the content of the page the icon links to is beneficial. For instance, an icon linked to a blog post about “WordPress Tips” should have alt text such as “WordPress Tips.” This clear and concise description will improve search engine rankings for the related content.
Best Practices for Descriptive Alt Text
Using concise, descriptive alt text is key for both accessibility and . Avoid stuffing. Instead, focus on using relevant and accurate language. For example, don’t use “Blog Post Icon” if the icon is linked to a post on “WordPress Theme Customization.”Use alt text to convey the purpose of the link, not just the icon itself. Consider the user’s intent and how they might search for the information.
Use clear and concise language, avoiding jargon or overly technical terms.
Examples of Accessible Image Icons with Alt Text
| Icon | Link Destination | Alt Text | Description ||—|—|—|—|| A shopping cart icon | Checkout page | “Shopping Cart” | A shopping cart icon linked to the checkout page. || A house icon | Homepage | “Home” | A house icon linked to the homepage. || A user icon | Profile page | “Profile” | A user icon linked to the user’s profile page.
|| A plus icon | Add new post | “Add new post” | A plus icon linked to a new post creation form. |These examples illustrate how accurate and concise alt text can improve both accessibility and for your WordPress navigation menus. By incorporating these practices, you’ll enhance the overall user experience while improving your website’s search engine rankings.
Troubleshooting Common Issues
Adding image icons to WordPress navigation menus can sometimes present challenges. Understanding potential problems and their solutions is crucial for a smooth implementation. This section will detail common issues and effective troubleshooting steps.Image icons, while visually appealing, can cause problems if not handled correctly. Careful consideration of image loading, positioning, and responsiveness is vital for a seamless user experience.
Troubleshooting involves identifying the root cause of issues, applying appropriate solutions, and, in some cases, adapting to specific icon libraries or theme configurations.
Image Loading Issues
Incorrect image paths or corrupted images can lead to loading problems. Verify the image file exists in the correct location, and ensure the path is accurate in the WordPress menu settings. A common mistake is forgetting to upload the image to the media library before linking to it. Double-checking the file name and format (e.g., .png, .svg) is also essential.
Positioning and Alignment Problems
Issues with icon positioning within the navigation menu often stem from misconfigured CSS styles. Inspect the relevant CSS rules in your theme or custom stylesheet to ensure the icon’s position aligns with your design expectations. If icons are overlapping or misaligned, adjust the `margin`, `padding`, or `float` properties within the CSS. Carefully review the specific CSS rules affecting the navigation menu elements.
Responsiveness Issues
Image icons may not scale correctly across different screen sizes. Ensure the images are optimized for various screen resolutions and use appropriate image formats (e.g., SVG for vector graphics) for scalability. In addition, review your theme’s responsive design implementation to ensure icons adjust properly with screen size changes. Test the icons on various screen sizes (desktop, tablet, mobile) to detect any display issues.
Icon Library-Specific Troubleshooting
Different icon libraries might have unique configuration requirements. Consult the library’s documentation for troubleshooting specific issues. Check for updates to the icon library, as newer versions often address common problems. If a specific icon library doesn’t load or display correctly, refer to its support forums or dedicated documentation.
Theme-Specific Troubleshooting
Some WordPress themes might have specific styles or functions that conflict with image icons. Identify the theme’s documentation and check for known compatibility issues. Consider using a child theme to apply your custom modifications without altering the parent theme’s files. If a theme’s CSS clashes with the icon styles, consider using custom CSS to override conflicting styles.
CSS Conflict Resolution
CSS conflicts can lead to unexpected visual issues with image icons. Identify the conflicting styles in your theme’s CSS and your custom CSS, and prioritize which styles should take precedence. Using browser developer tools, inspect the elements to pinpoint the source of the conflict.
Troubleshooting Table
| Problem | Possible Causes | Solutions |
|---|---|---|
| Image not loading | Incorrect image path, corrupted image, missing image | Verify image path, check image integrity, ensure image is uploaded to media library |
| Icons overlapping/misaligned | Incorrect CSS positioning, conflicting styles | Adjust CSS margin, padding, float; inspect conflicting CSS rules |
| Icons not scaling responsively | Incorrect image format, missing responsive design | Use SVG format, ensure theme’s responsiveness; optimize images |
| Icon library issues | Outdated library, conflicting CSS, configuration errors | Update icon library, review documentation, adjust configurations |
| Theme conflicts | Conflicting theme styles, incompatible extensions | Use a child theme, review theme documentation, check for conflicts |
| CSS conflicts | Conflicting styles in theme or custom CSS | Inspect conflicting styles; prioritize CSS rules; use developer tools |
Closing Notes
In conclusion, adding image icons to your WordPress navigation menus is a straightforward process that significantly improves the user experience. By following this comprehensive guide, you can transform your site’s menu from functional to visually captivating. Remember to prioritize accessibility and responsiveness for a truly polished user interface.